These days, any business serious about becoming successful has to have a solid webinar marketing strategy. Webinars are a great way to educate target audiences about your product/service, convert registrations into leads and customers and build relationships with them. In order to reap these benefits, you need the right tools. But where do you begin? How do you sync contacts between lead capturing forms and webinar tools? How do you trigger reminder/confirmation emails at the right time? In this article, we discuss how you can integrate HubSpot and Zoom to market your webinar effectively.
1. Setup Zoom Webinar
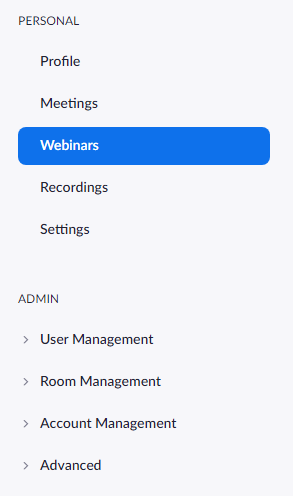
Once you login to the Zoom portal, navigate to "Webinars" section using the left side menu.
In the webinars section, you get to see sub-sections for "Upcoming Webinars", "Previous Webinars" and "Webinar Templates". Click on "Schedule a Meeting" in the Upcoming Webinars section.
Fill out the webinar details such as Webinar title, description, date and time. Zoom also offers features to generate landing page and automated emailers. However, we do not use those features for the following reasons:
- Inability to track landing page performance and
- Inability to track email engagement
Once you fill the webinar details on Zoom, hit "Schedule" and you will be redirected to manage the webinar.
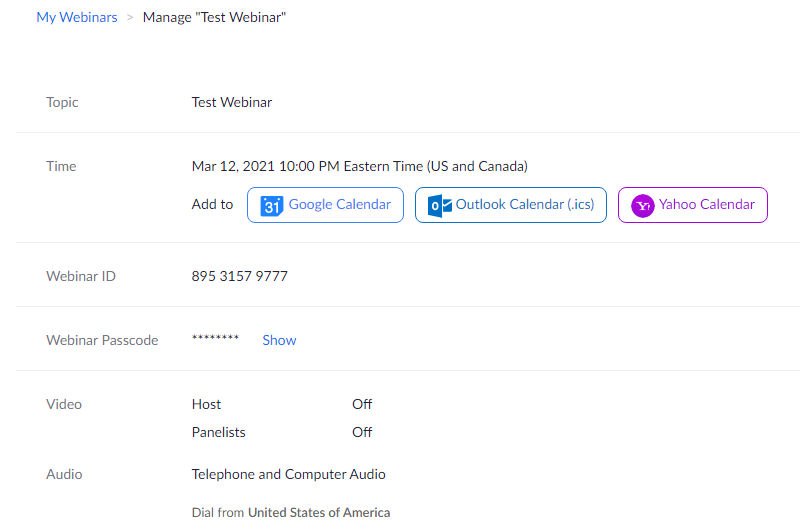
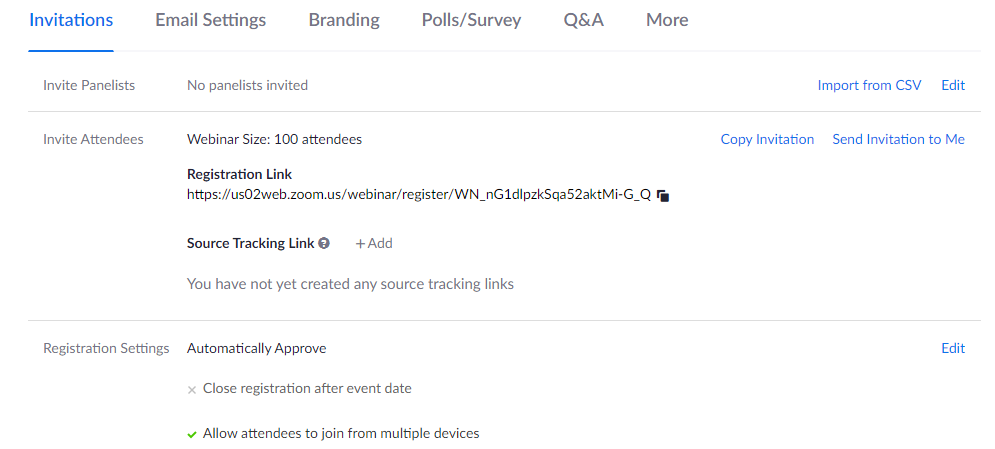
Below the webinar details, you will see several options to manage your webinar registrations, branding and email settings. In the email settings, you can enable automated confirmation/reminder emails to be sent to registrants.
2. Setup HubSpot Forms & Landing Page
Navigate to the Marketing Section in the Header to create a form for the landing page. Drag and drop the required properties needed in the form. If you are running this webinar for any existing leads, you can gain more intel about them using Progressive Fields. Publish the form once the required properties are added. You can copy the embed HubSpot form code to your landing page built on other CMS such as WordPress, Wix or others.
You can also use HubSpot to create landing pages using Drag & Drop Editor. To know about step-by-step guide to creating landing pages on HubSpot, click here.
3. HubSpot and Zoom Webinar Integration
Click on the marketplace icon located at the top right corner to go to HubSpot app marketplace. Search for Zoom app and install it. A popup window opens up asking for Zoom login credentials for authorization and integrating HubSpot with Zoom.
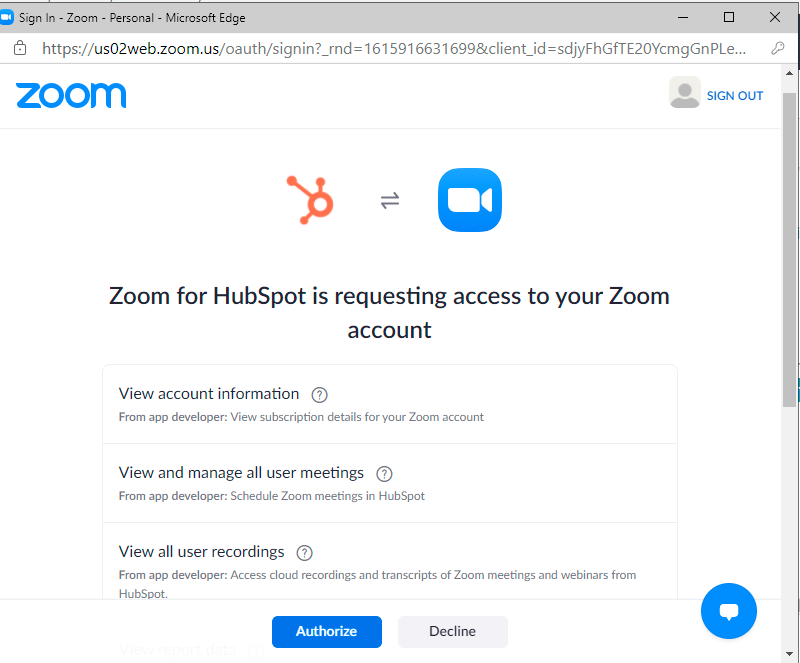
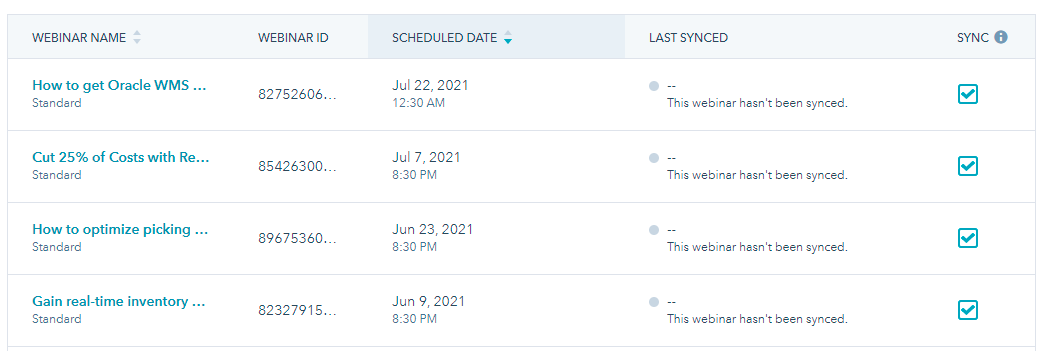
Once you authorize the access to Zoom account, HubSpot integrates with Zoom and syncs the webinar data from Zoom. You also get to see all of your upcoming Zoom webinars as well as the last sync dates. You can also re-sync the data for each webinar by clicking on "Re-sync" button next to webinar name.
4. Plan Webinar Marketing Activities
HubSpot Workflows help you automate marketing activities, run campaigns on time and generate registrations for the webinar. Create a series of webinar email templates in the HubSpot email marketing tool to promote your webinar. Define the workflow goal as registrations, set the enrolment criteria and build contact based workflows to send marketing emails automatically. Once a contact signs up on the website, the contact automatically exits from the workflow and does not receive further marketing emails related to webinar.
Next, run a new contact-based workflow with form submission as a enrolment trigger to send webinar confirmation emails to registrants. Parallelly, enroll the registrant in date-centered workflow to send reminder emails. In the confirmation and reminder emails, use the "Last registered Zoom webinar" object to add the unique link to join the Zoom webinar.
4. Test the Workflows
Now that you have everything in place, it is time to test the workflows. The easiest way to test workflows is using the "Test tool" available in the top-right corner of your individual workflows.
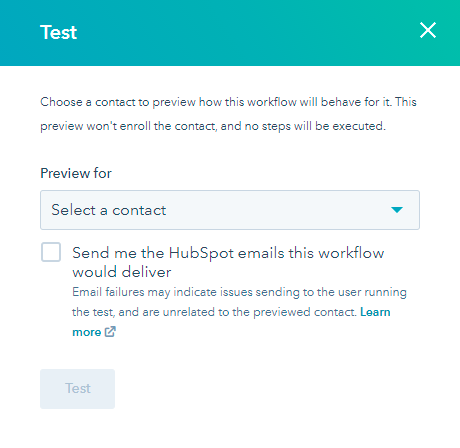
The Test tool allows to preview how the workflow will behave for a particular contact and validate the email flow. You can also receive the defined emails as a particular contact as part of the workflow testing.
Once the testing is completed and workflows are validated, turn on your workflows and kick start your webinar marketing activities.
5. Conduct the Webinar on Zoom
One the webinar date, log back in to Zoom and conduct the webinar. Zoom webinars offer practice sessions and auto-cloud recording options that make it easy for presenters to practice the webinar script, content and presentation.
6. Export Attendance data and Set Enrolment Criteria for Follow-Up Emails
After the webinar is over, you can go back to HubSpot and create an active list of attendees for the webinar completed. Once the list is created, create a webinar follow-up workflow with the "active list of attendees" as enrolment criteria and run the workflow.
7. Setup Nurturing Workflows
You have successfully ran a webinar and have generated registrations. Now, its time to convert the registrants to customers using nurturing workflows that educate and engage your contacts in the buying journey.