HubSpot is an All-in-One CRM software solution that integrates a set of modules to improve marketing, sales, customer care, and back-end processes.
HubSpot's free CRM (customer relationship management) is widely utilized by businesses, especially by those with less than 1,000 employees.
HubSpot also has a website builder as part of the CMS hub, which many people aren't aware of. You can use the CMS hub to make a fully functional website for your company and have it up in no time.
Therefore, we'll show you the ropes in our HubSpot website builder tutorial for newbies. We'll achieve this with HubSpot CMS hub Starter, which is designed keeping both the beginners and professional developers in mind.
What Are the Steps to Making a HubSpot Site?
Let's get started with our 2023 HubSpot CMS hub guide, that will teach you how to set up a HubSpot website using the HubSpot Website Builder.
1.HubSpot CRM Sign Up
You can go to your site right from the CRM dashboard.
If you're planning on using HubSpot's website builder, you should familiarize yourself with how the free CRM works first.
We recommend checking out this article before signing up for a HubSpot account if you're unfamiliar with HubSpot's features. To purchase CMS Hub Starter, all you have to do to join is tap 'Buy Now' to sign up.
2. Navigate Through HubSpot’s Dashboard
After you've signed up with HubSpot, you'll be redirected to the dashboard.
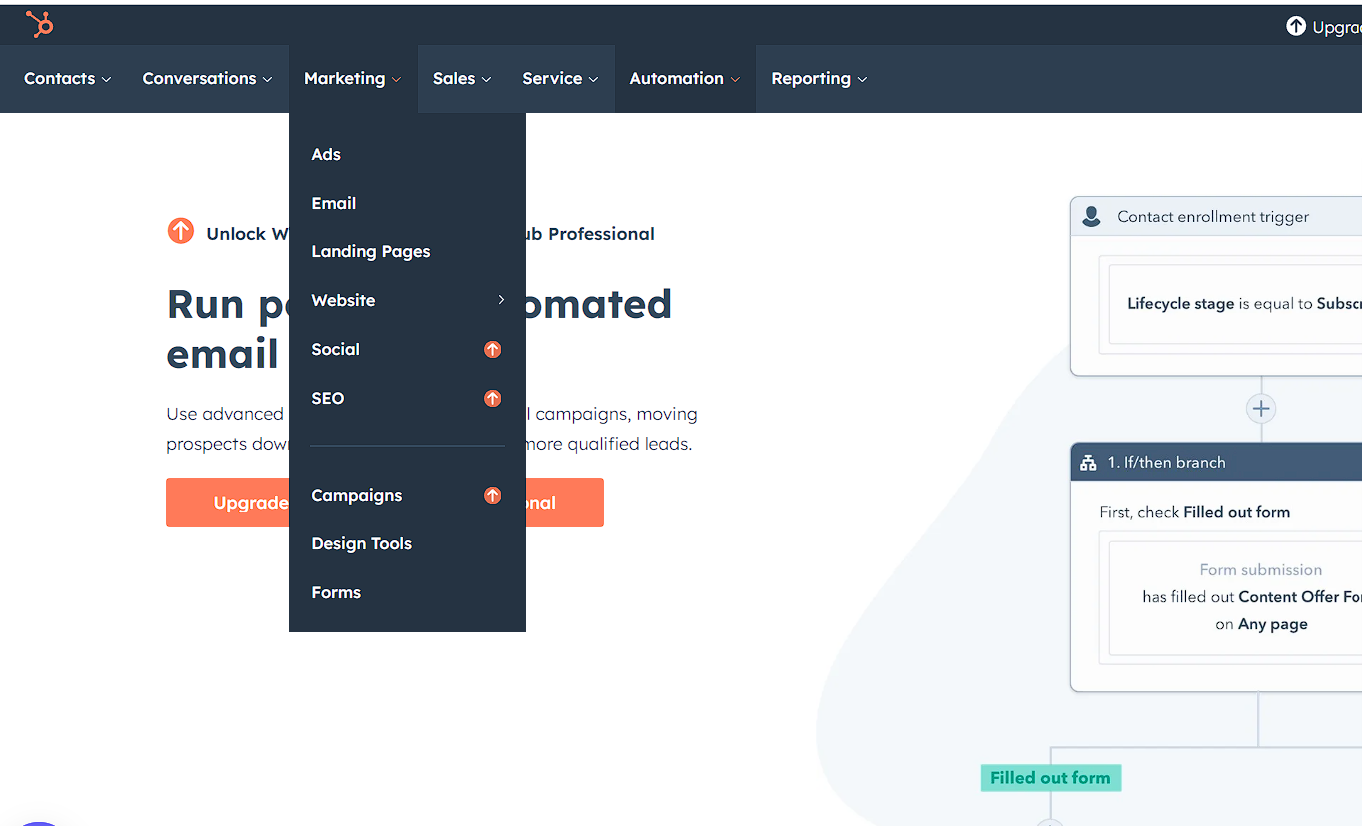
Take note of the navigation menu across the top of your dashboard for accessing various HubSpot features including contacts, discussions, marketing, sales, support, automation, and reporting.
Here, you’ll have to work with the 'Website' option that is categorized inside the 'Marketing' tab.
3. Website Pages vs. Landing Pages
You can start making your HubSpot site once you've upgraded to HubSpot CMS hub Starter.
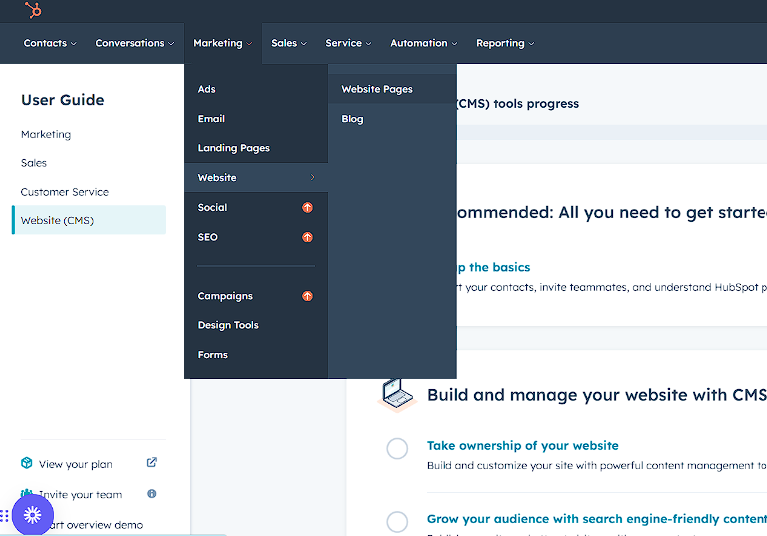
- First, you can find the "Marketing" Tab. Click on it.
- You should now be able to see the "Website" tab..
- Now, tap on "Website." You should be able to find two options, ‘Website Pages’ and ‘Blog’
- Now, click on ‘Website Pages’.
Pages are the backbone of your website and will be there forever.
However, landing pages are not the same as regular web pages, as we've mentioned before on the blog.
The homepage, a page for getting in touch, a "about us" section, individual product and service pages, and so on are all good examples of a webpage.
Landing pages, on the contrary, are meant to have a singular call to action (CTA). Landing pages can be created for a variety of targeted purposes, including gathering contact details, generating leads, and boosting sales. Simply put, these are purpose-built web pages that stand on their own.
Landing pages are usually created by the businesses to attract and convert paid visitors. A/B testing plays an important role to achieve the above goals, and you can refer to this blog for some tips on A/B testing your pages.
4. Set Up Your Website
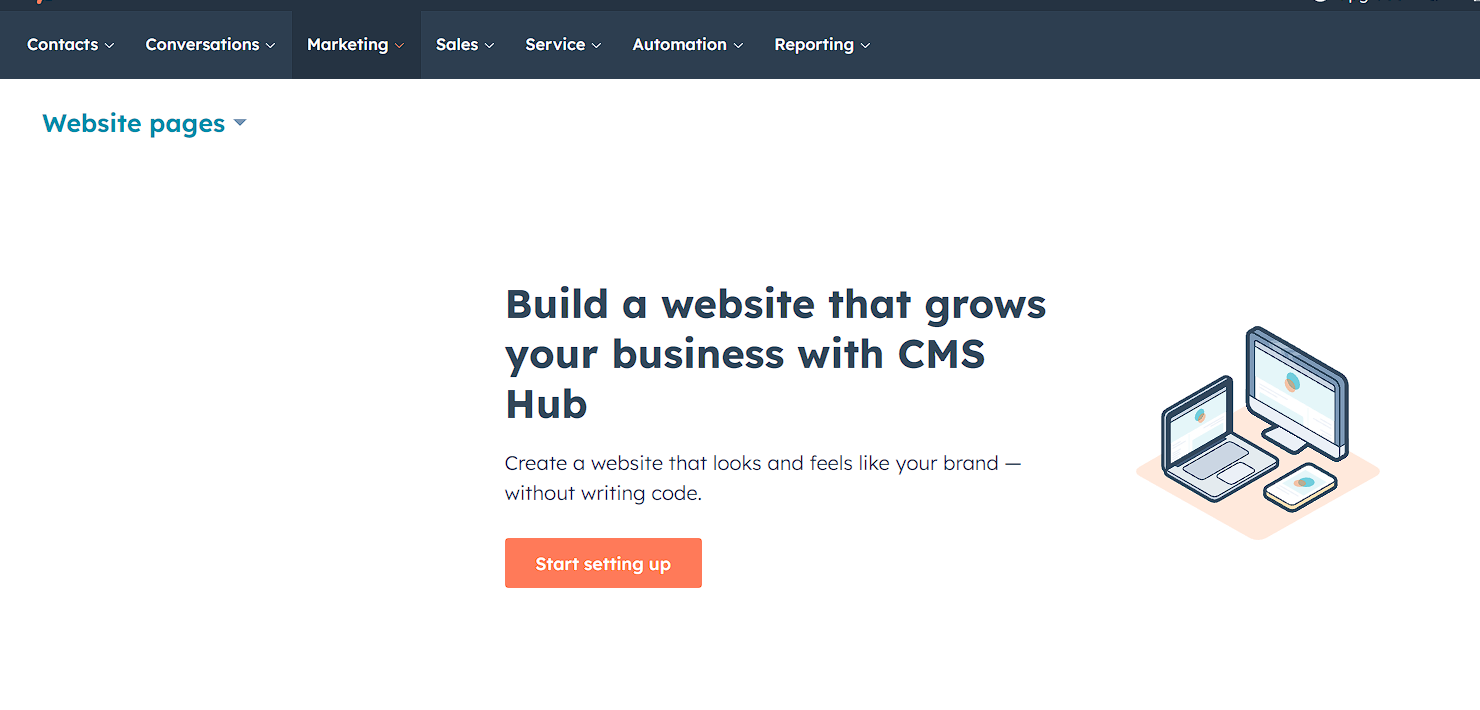
- Click "Start Setting Up" below "Website pages" (see screenshot for details).
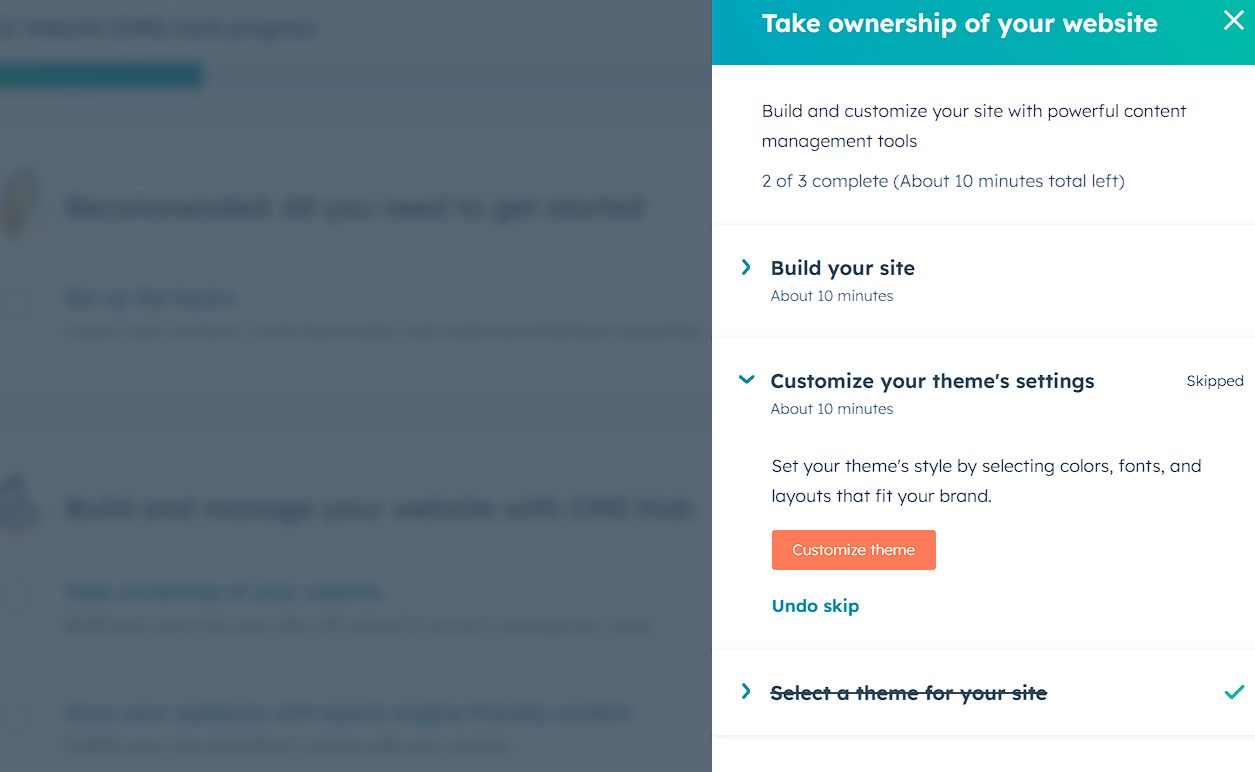
- Now, choose the "Customize Theme" option from the "HubSpot CMS Hub Starter" menu. The typeface, color scheme, and background image can all be tweaked here.
- Next, select a global color scheme for your HubSpot website template that is consistent with your company's image. The color scheme can be modified later. Let us select the ‘BOLD’ option for this example.
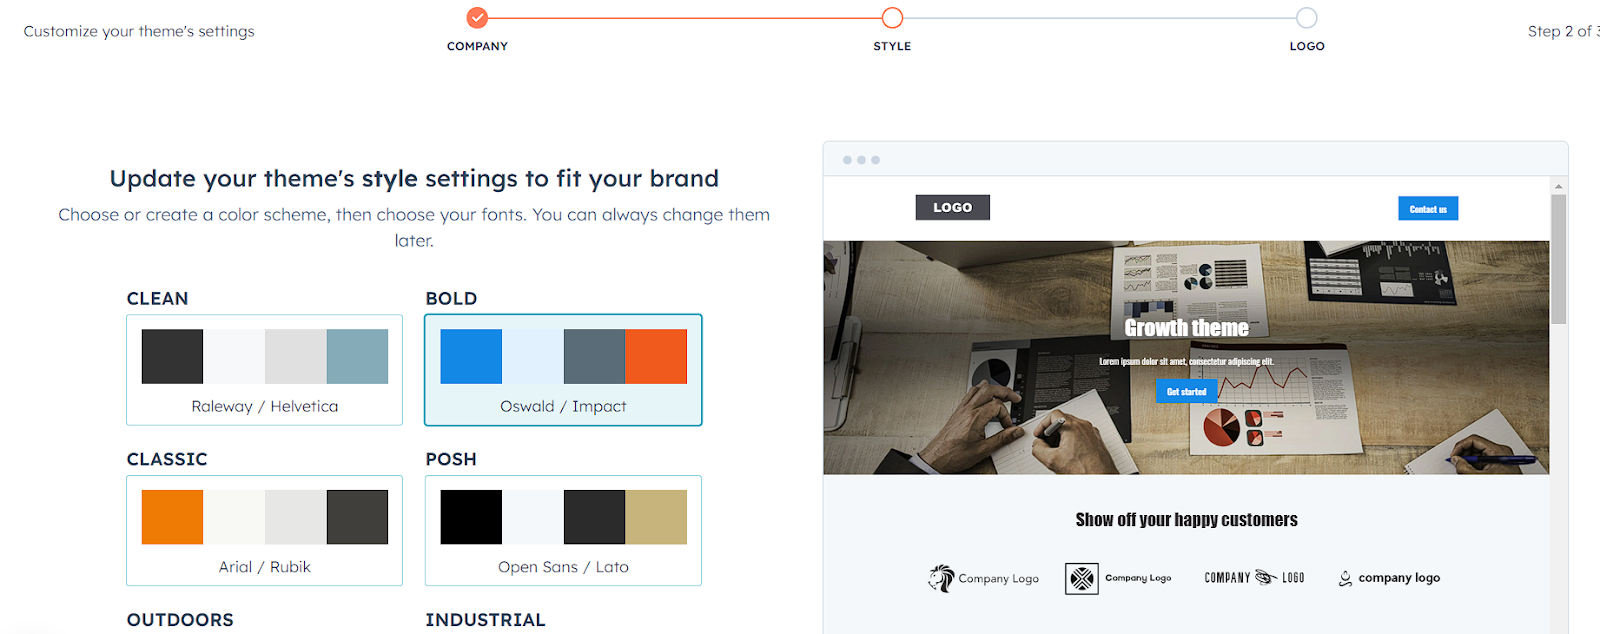
- You can also choose "CREATE MY OWN" here if you'd rather make your own custom global color scheme.
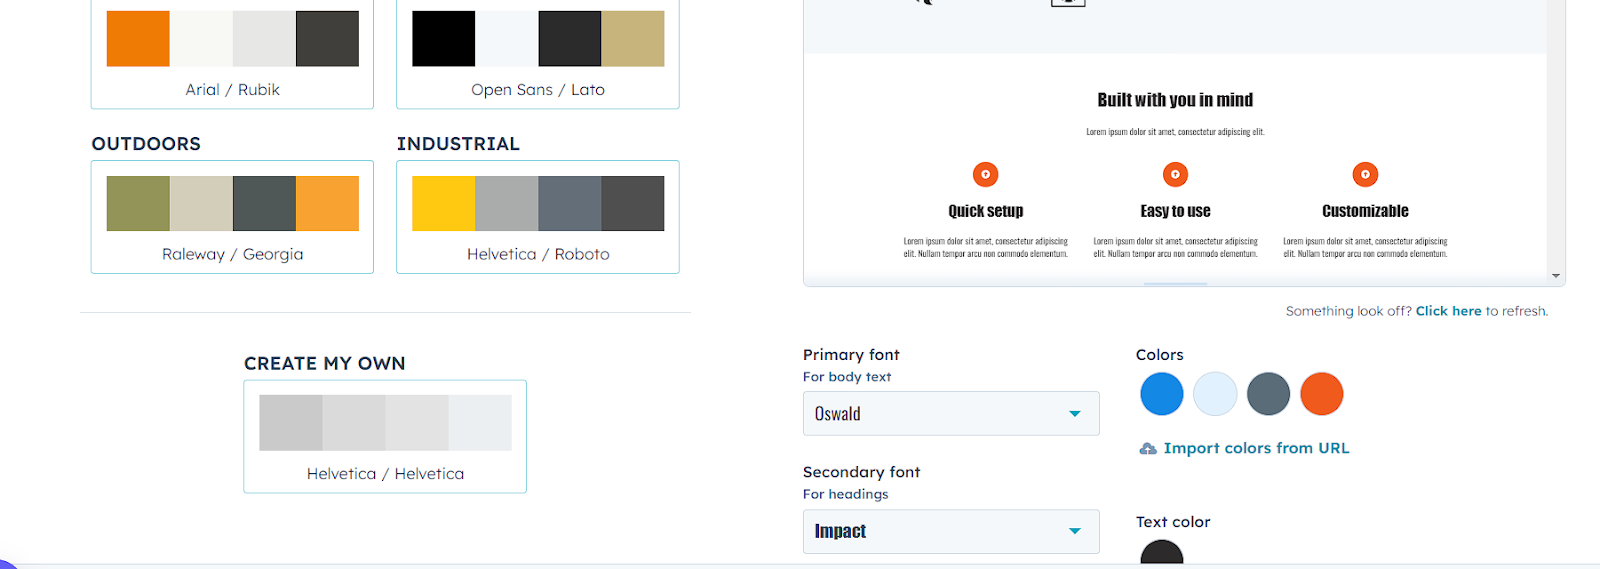
- Pick a “primary font” for use in the main text. Keep in mind that any edits will affect your HubSpot website in its entirety.
- You may view the updated version over on the right.
- Select a “secondary font” from the menu that appears. Your headings will be formatted in this way.
- Adjust the site's color scheme to better fit your brand's aesthetic needs. For example here, Gray for borders and Orange for elements such as buttons and hyperlinks.
- If necessary, adjust the text color, else the standard font color of black will be maintained.
- Select the Next button.
Creating the Logo
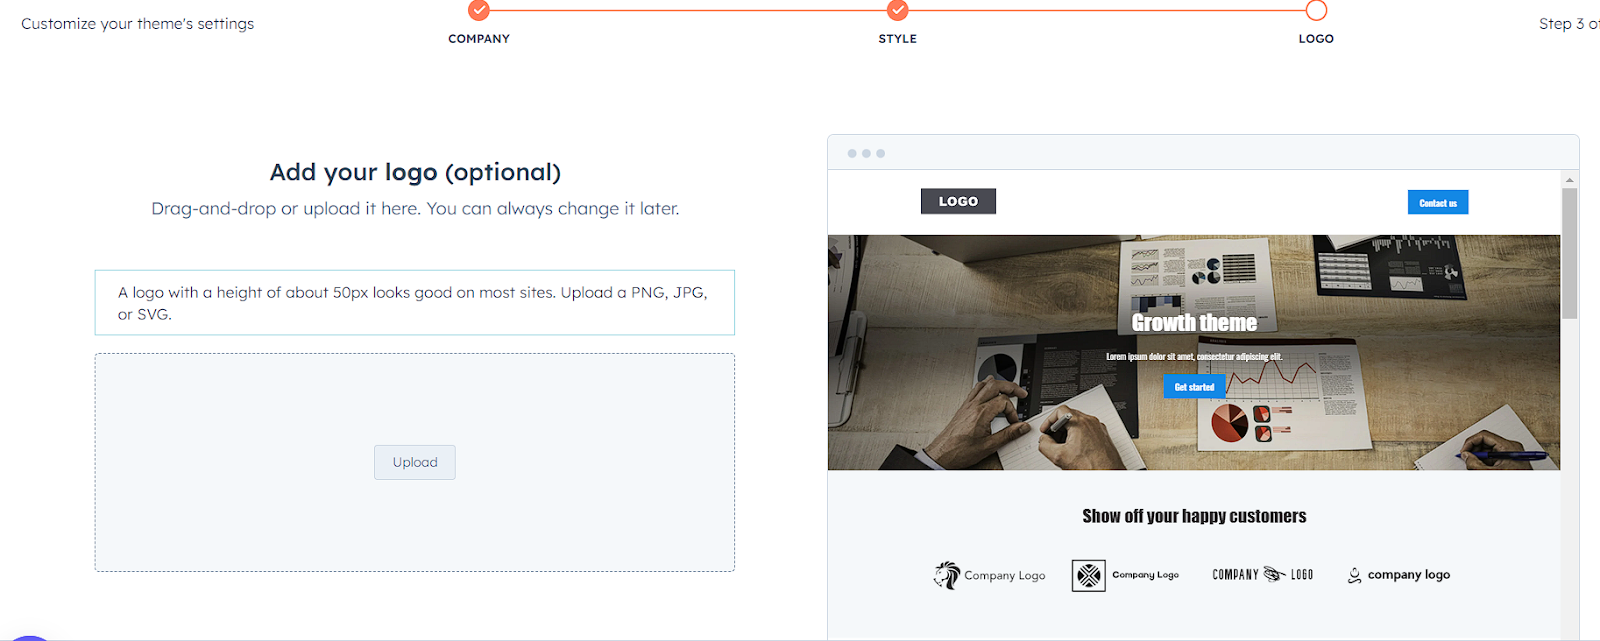
Upload the logo. If you need a logo for your company but don't have one, you can make one with Canva for free.
Make any necessary adjustments to the logo's dimensions before clicking "Finish."
5. Build Your Website
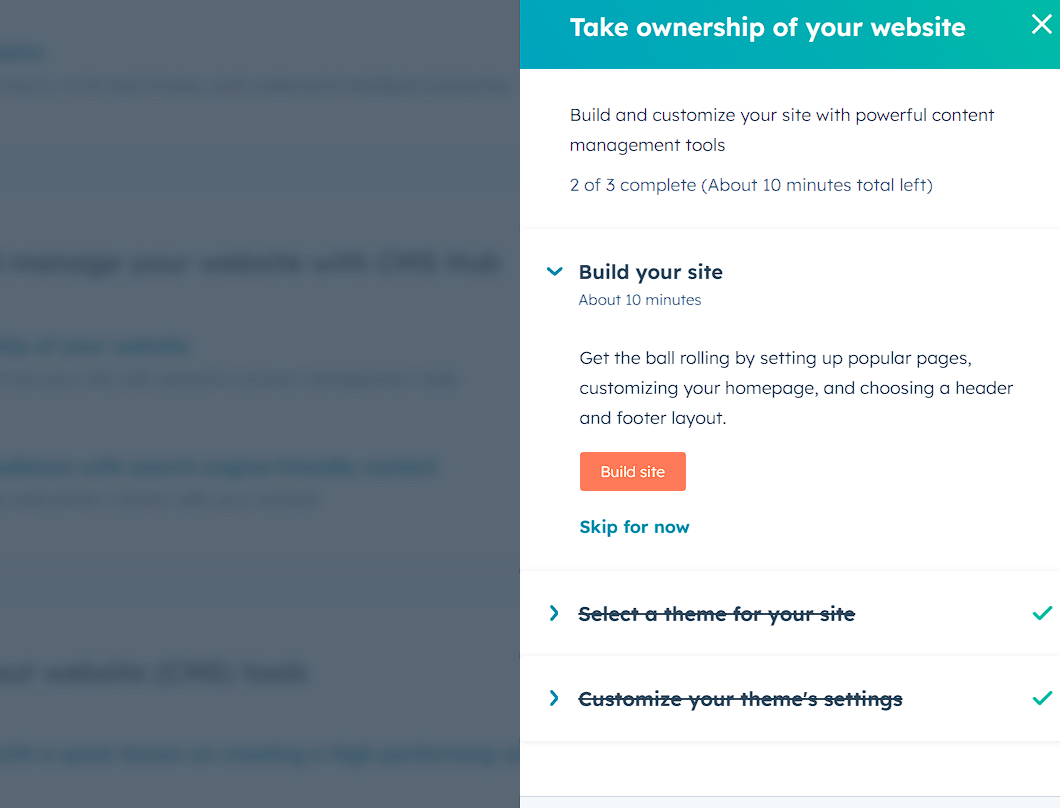
Referring to the screenshot above, select the 'Build site' option.
- Include the main sections of your site. The price, products, contact, about, and home pages have been preselected by the HubSpot CMS hub. More HubSpot web hosting pages can be added at a later time. De-select the options that are unnecessary.
- Select “Next”.
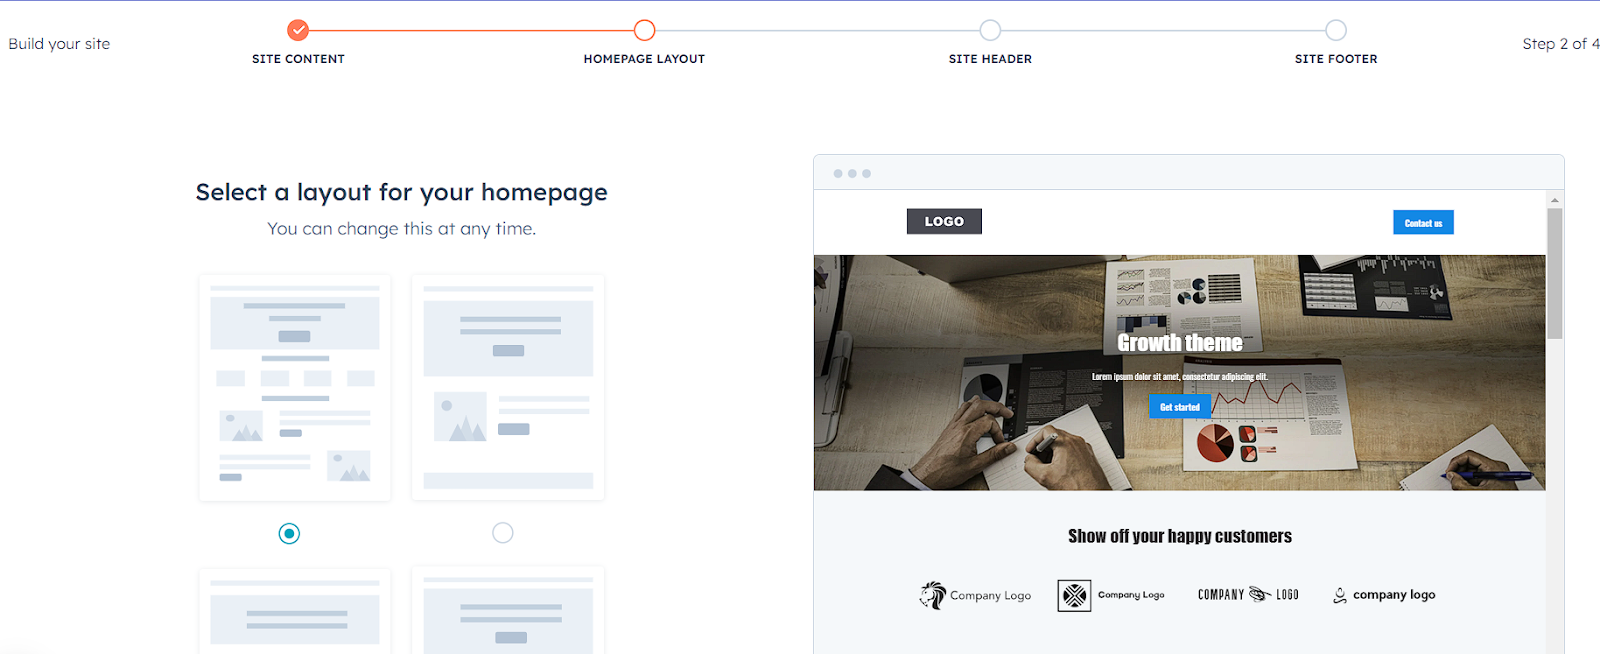
- Pick your business industry. Pick out the HubSpot web hosting home page's style and pictures. Now continue with "Next."
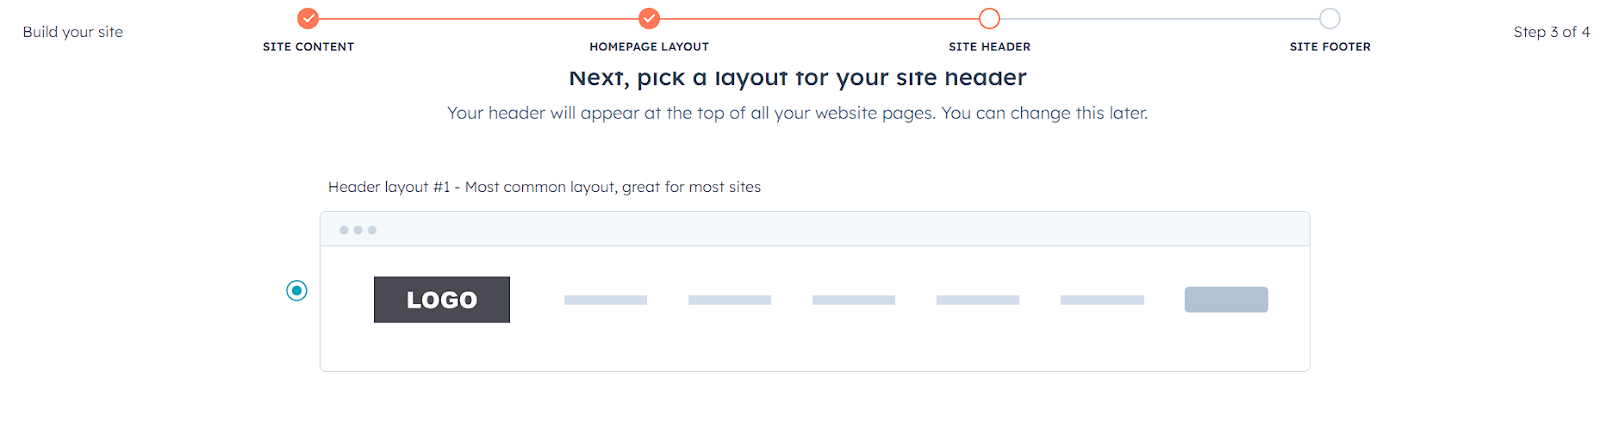
- Now, pick a banner for the whole site. We will use the initial header design, which is also the most popular in HubSpot. Here, the logo is positioned to the left in this style, and the menu items are right adjacent to it. Refer to the screenshot.
- Press "Next."

- Pick a world footer for your site. 'Global' again means that the bottom will show up on all of your HubSpot pages. Footer style #2 is what we'll use for this HubSpot website builder guide.
- Press "Finish."
Now, wait a moment for HubSpot to finish loading the website's pages.
6. Customize Website Pages
HubSpot has a visual, drag-and-drop editor that we'll walk you through configuring for your own website's needs.

- Select "Start Publishing" to begin.
- The 'Website pages' tab should remain active. Your previously selected website pages will appear here. They haven't gone live yet.

- We can make these webpages public by going to the 'More' tab, then clicking the 'Publish' button next to each one. However, personalization is required first.
- Any online HubSpot web hosting page can be copied as well. Using this strategy, you can quickly whip up professionally looking web pages with only minor tweaks to the content and the design. The cloning method is highly recommended for constructing product pages.
- 'Create' can be used to add a new webpage by selecting 'Website page' from the available options.
7. Add Blog (Optional)
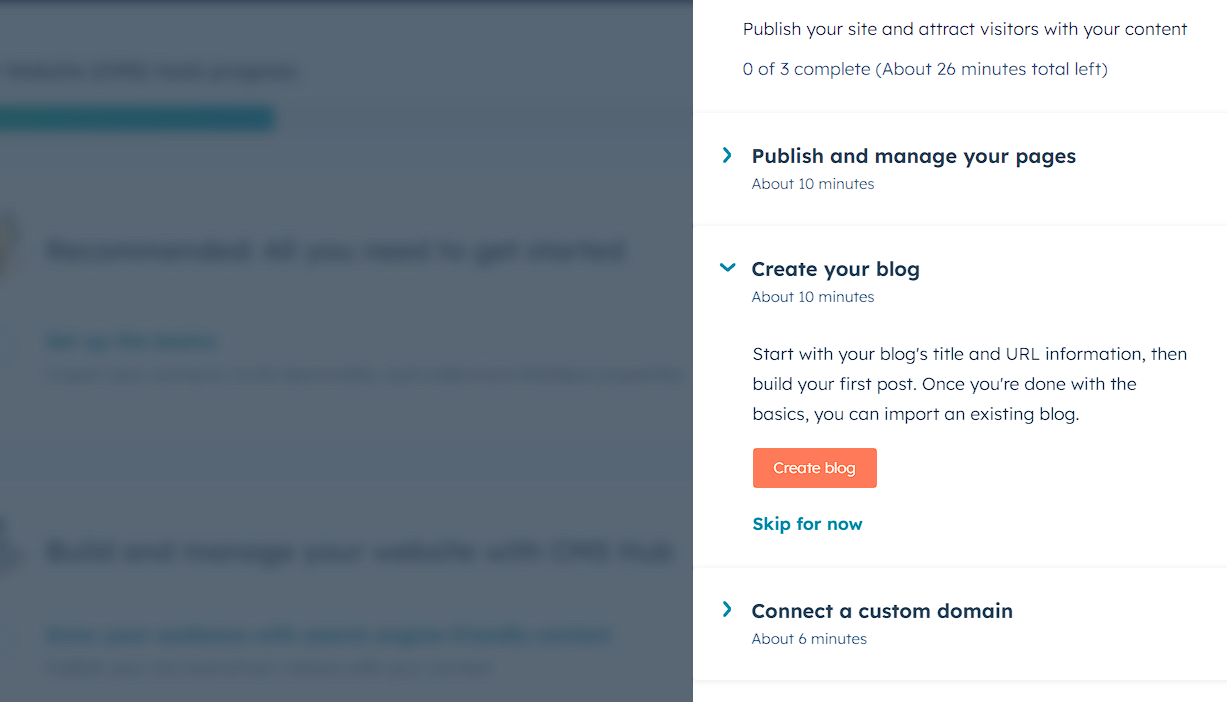
- Tap on the ‘Marketing’ button.
- Now, move to ‘Website’, after that go to ‘Blog’ or Click on “Create blog” (Screenshot)
This is where you can consistently create and publish your blog posts.
Your brand-related blog posts might be about anything of interest to your target audience, such as industry developments, product updates, useful information, etc.
Pro Tip: Keep in mind that blogging is a vital organic SEO strategy for improving your visibility in search engines like Google.
8. Add Custom Domain
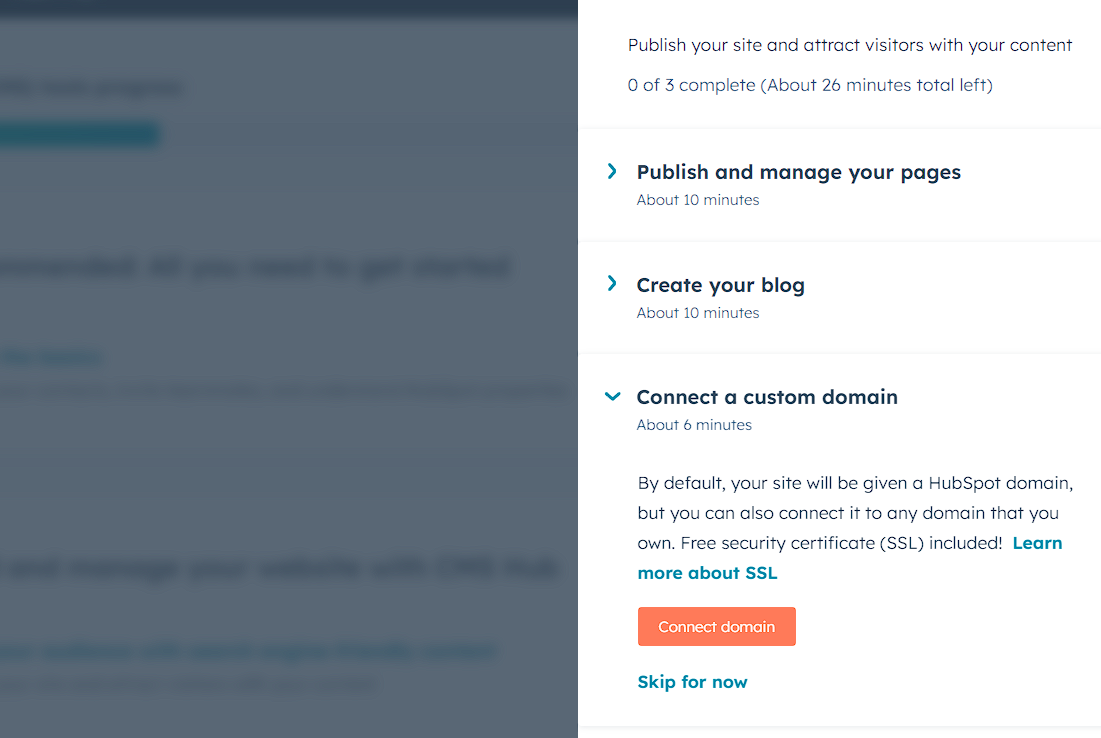
By default, your website will use the HubSpot domain.
- Go return to the 'Finish CMS Setup' menu.
- Select 'View Guide'
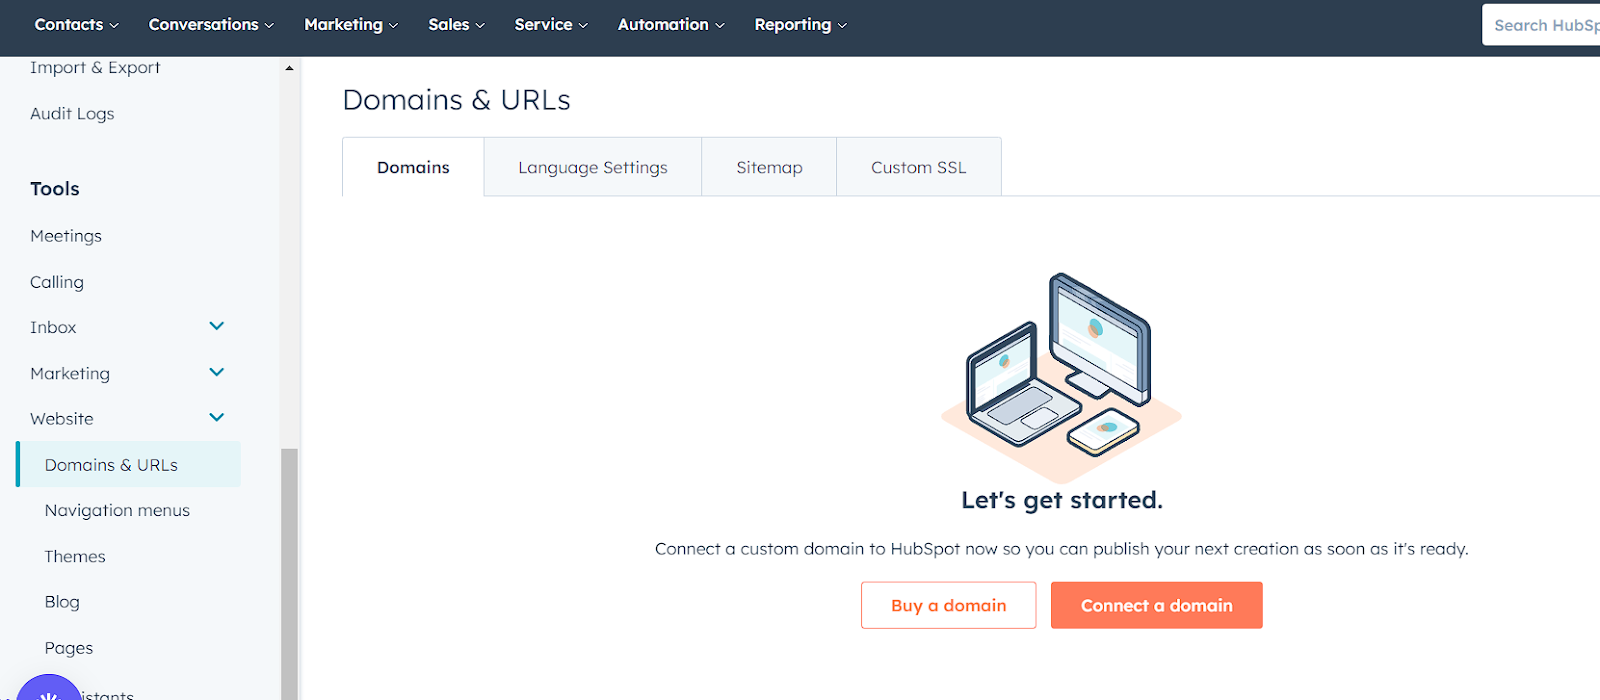
- Click ‘Connect a domain’, you can find this right under, ‘Connect your custom domain’ or you could also navigate to 'Settings > Tools > Website > Domains & URLs'
HubSpot also provides free SSL certification, which informs users that they are on a safe website.
Lastly, Publish the Website!
In this HubSpot web hosting lesson, we'll use the pre-assigned domain name to launch the finished site. You may launch the website in stages, one page at a time, after you've customized it.When you do that, all of your HubSpot pages will be accessible online.
With that, we end the HubSpot CMS hub website development guide for beginners, we hope you found this helpful!